Subaru Dual Port, Supersonic & Plumb Back InstructionsUpdated 2 months ago
| Product Name: | Subaru Dual Port, Supersonic & Plumb Back BOV |
| Product Description: | Fits WRX 01 – 07, WRX STI 01 – 08, Forester XT 06’ |
| Product Number: | TS-0205-1015 - DUAL PORT SUBARU -BLUE TS-0205-1016 - DUAL PORT SUBARU -BLACK TS-0205-1315 - SUPERSONIC SUBARU -BLUE TS-0205-1316 - SUPERSONIC SUBARU -BLACK TS-0205-1215 - PLUMB BACK SUBARU -BLUE TS-0205-1216 - PLUMB BACK SUBARU -BLACK |
IMPORTANT NOTES ON YOUR SUBARU SUPERSONIC BOV
- Please thoroughly read and understand these instructions before commencing this installation.
- The thread on the cap for the vacuum source is AN#3. The standard swivel nipple can be changed to a AN#3 fitting if desired.
RECOMMENDATIONS
- Turbosmart recommends that your Blow off valve (BOV) is fitted and adjusted by an appropriately qualified technician
- Turbosmart recommends that a boost gauge be permanently fitted to the vehicle
HOW TO INSTALL YOUR SUBARU DUAL PORT, SUPERSONIC & PLUMB BACK BOV
Please check that the following items have been provided in your Subaru Dual Port & Supersonic kit.
| Quantity | Description | Use |
| 1 | Subaru Supersoni BOV | Model Specific blow off valve |
| 1 | 34mm Blanking plug | To blank off standard plumb back hose |
| 1 | ½” straight hose joiner | Re-route breather hose |
| 1 | ½” rubber hose | Breather hose |
| 1 | ½ ” tee piece joiner | Re-route breather hose |
| 1 | 6mm Hose clamp | To secure vacuum hose onto vacuum nipple |
| 1 | Gasket | To seal the BOV to the intercooler pipe |
Remove the standard BOV from the intercooler by removing the two bolts. Disconnect the vacuum line to the top of the standard BOV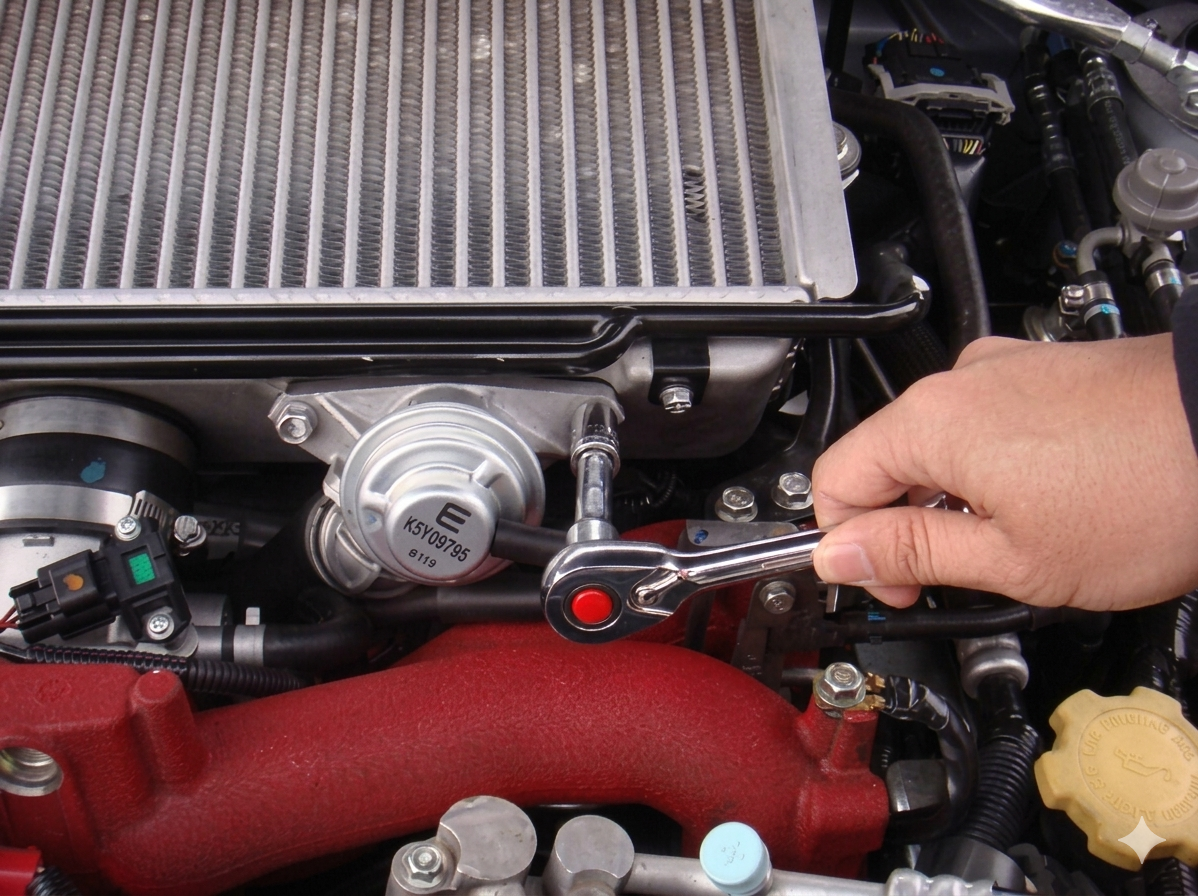
Using pliers, carefully clamp onto the spring clamp on the plumb back hose and pull the BOV off the hose. Then carefully remove the clamp completely.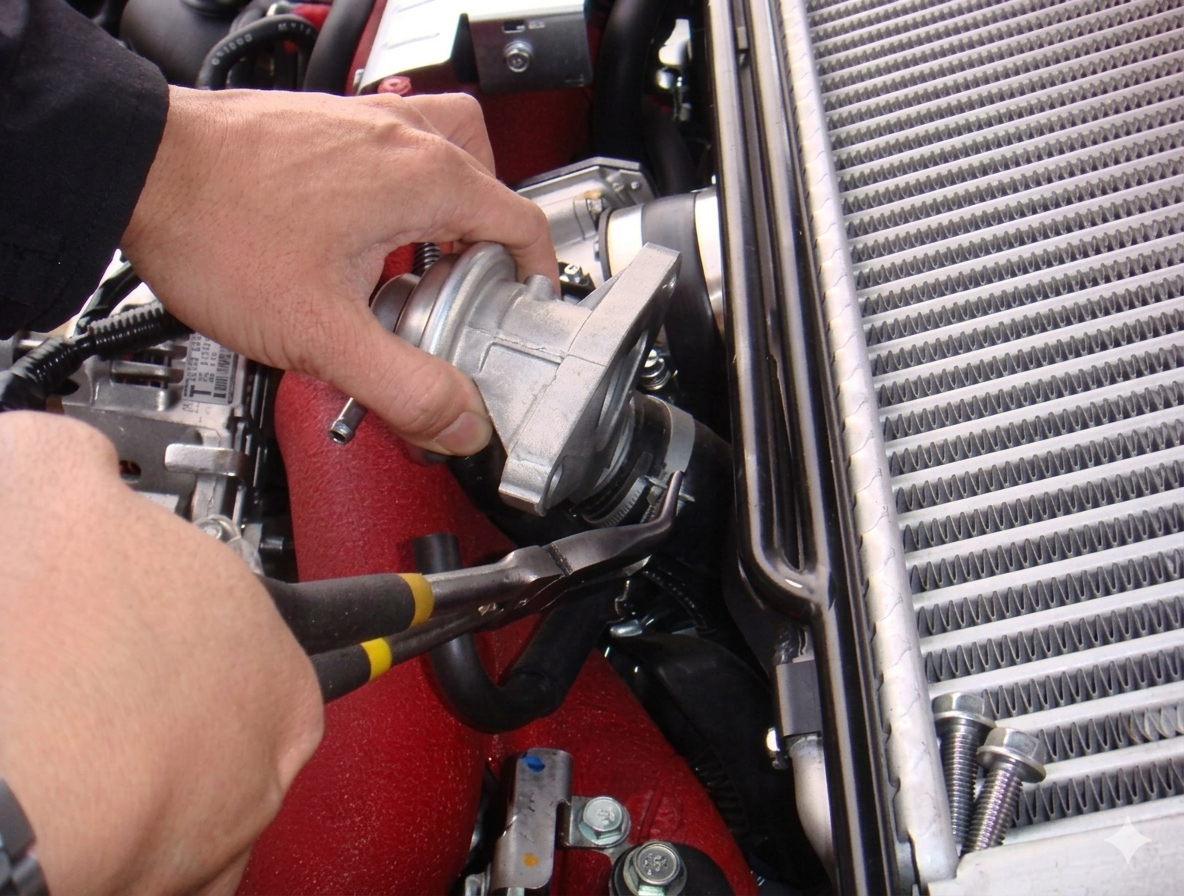
Remove the plumb back fitting on the back of the standard BOV and install it onto the Turbosmart BOV using the standard screws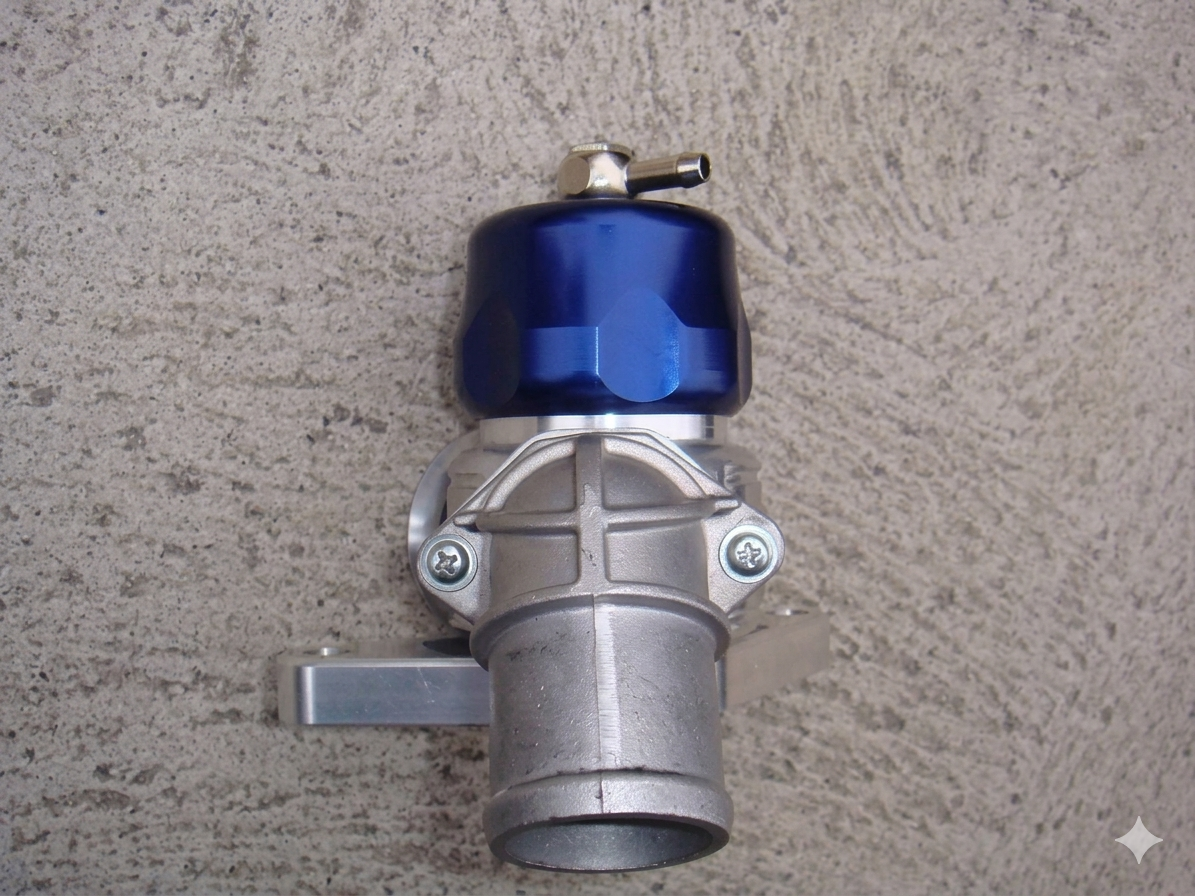
Remove the standard hose breather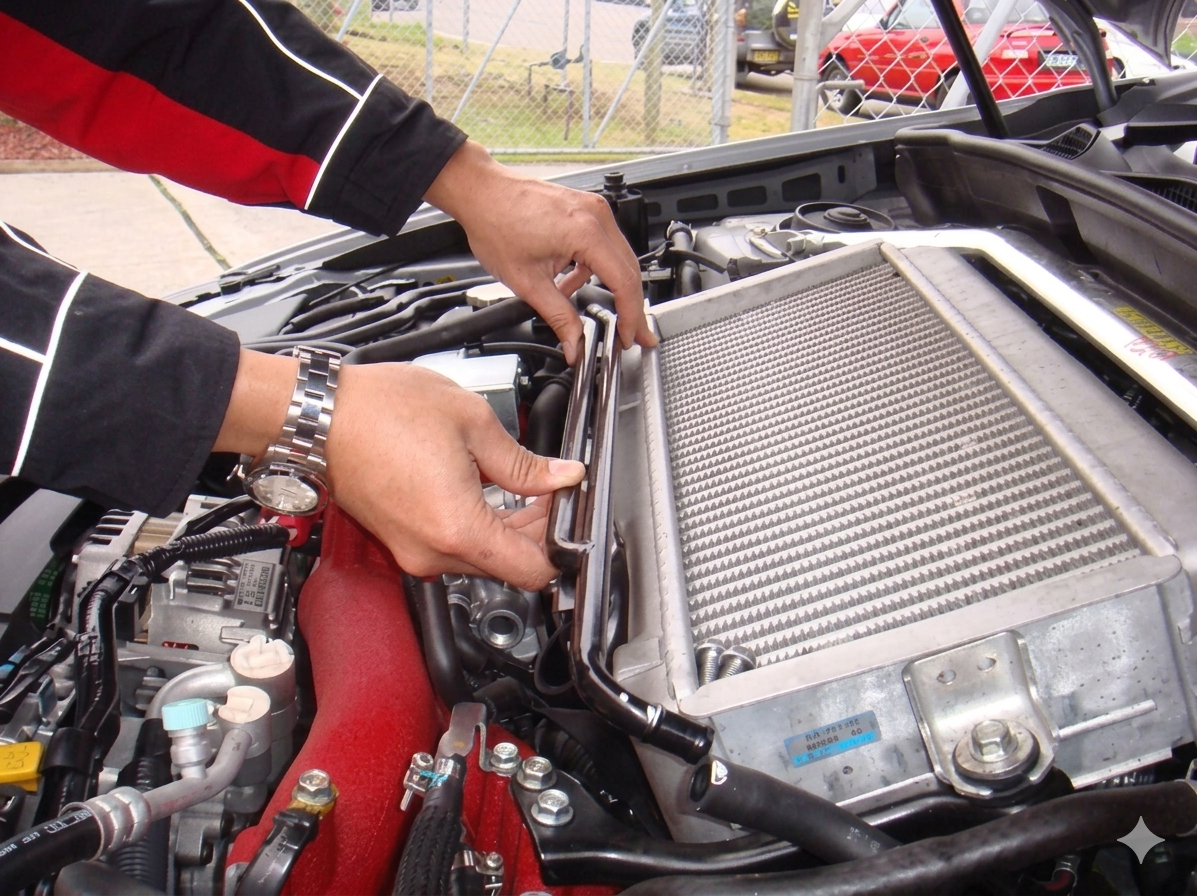
Using the provided ½” tee piece, connect the standard oil breather lines on the left hand side of the intercooler in the orientation shown in the picture below and run the provided ½” hose under the intercooler to the oil breather line on the other side of the intercooler, using the provided ½” straight joiner to join the rubber hose to the existing breather line on the right hand side.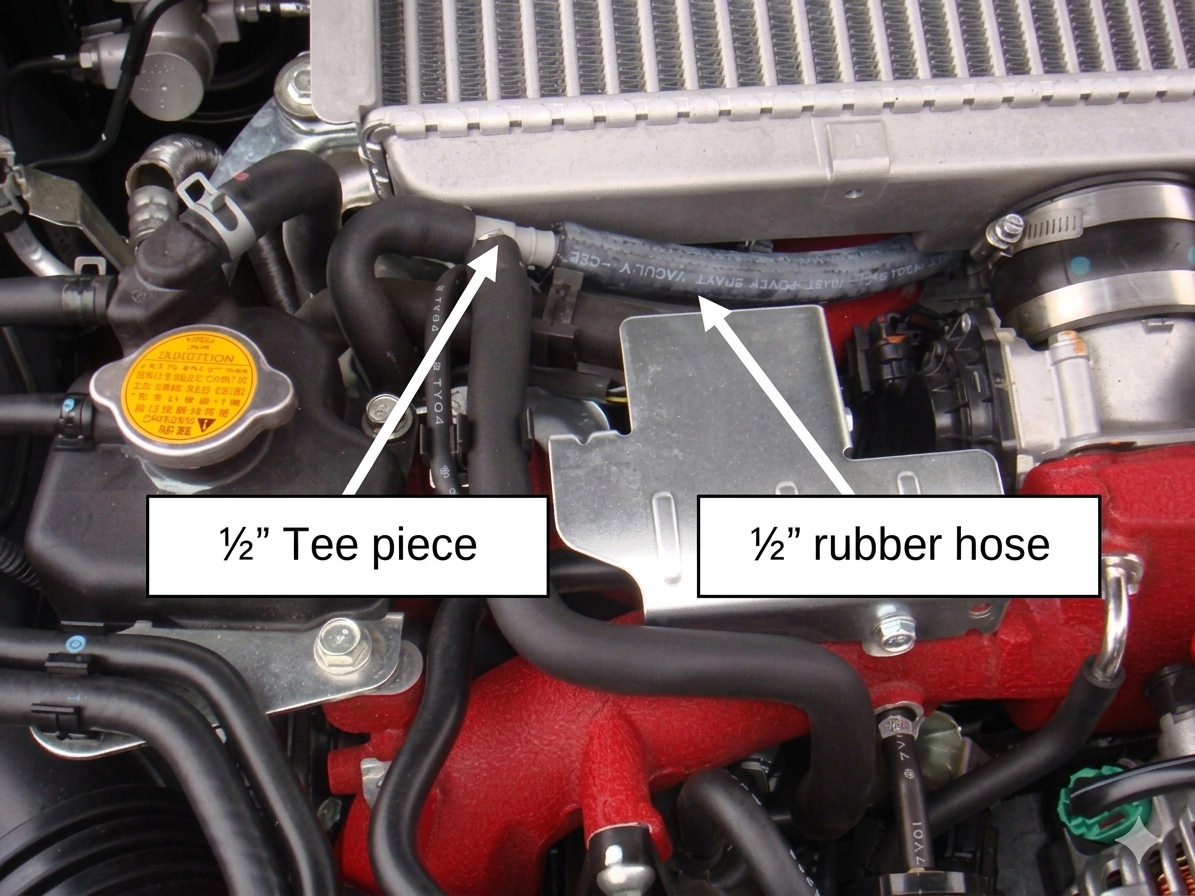
Push the plumb back side of the Turbosmart BOV onto the standard return pipe and secure the hose with the provided hose clamp. Unclip the hose shown in the picture from the bracket and move the line under the wiring loom that supports it.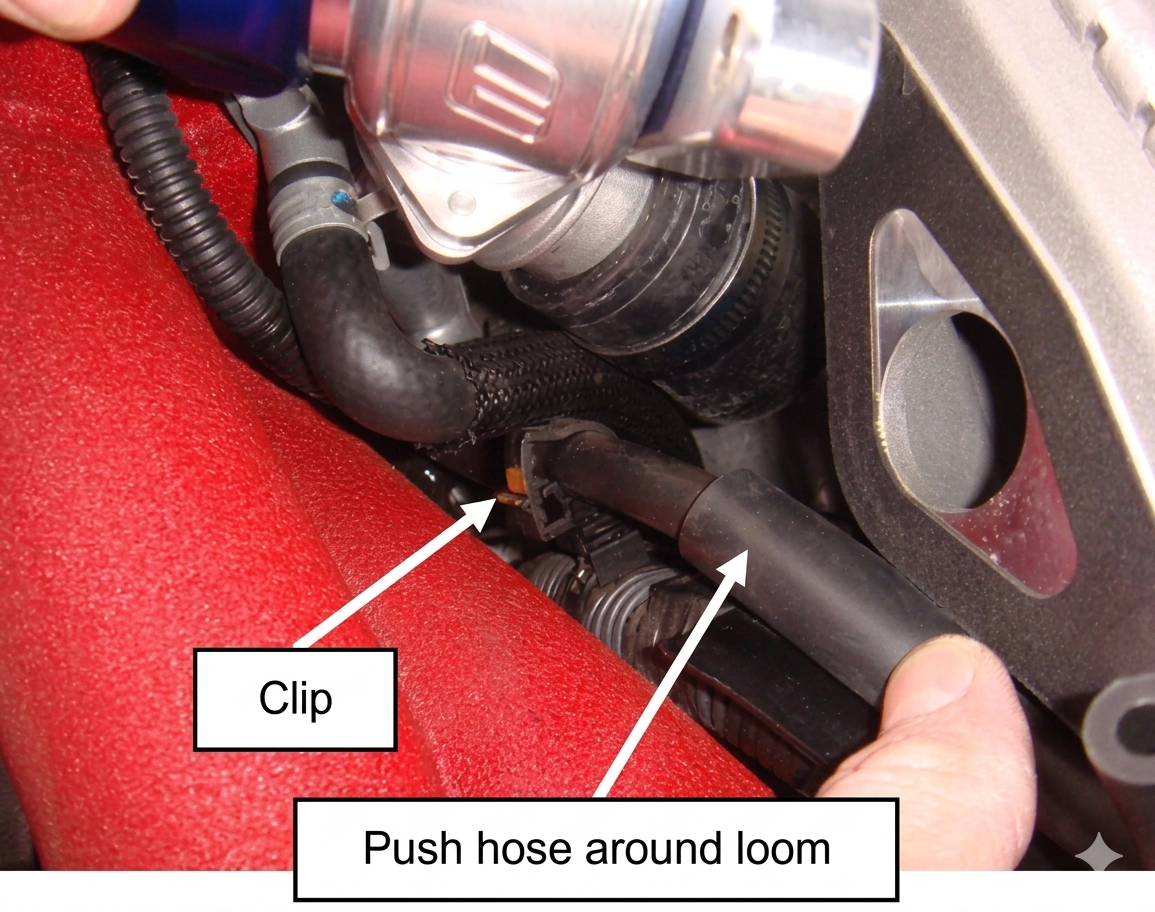
Secure the BOV onto the intercooler with the standard bolts and replace the vacuum line to the top of the BOV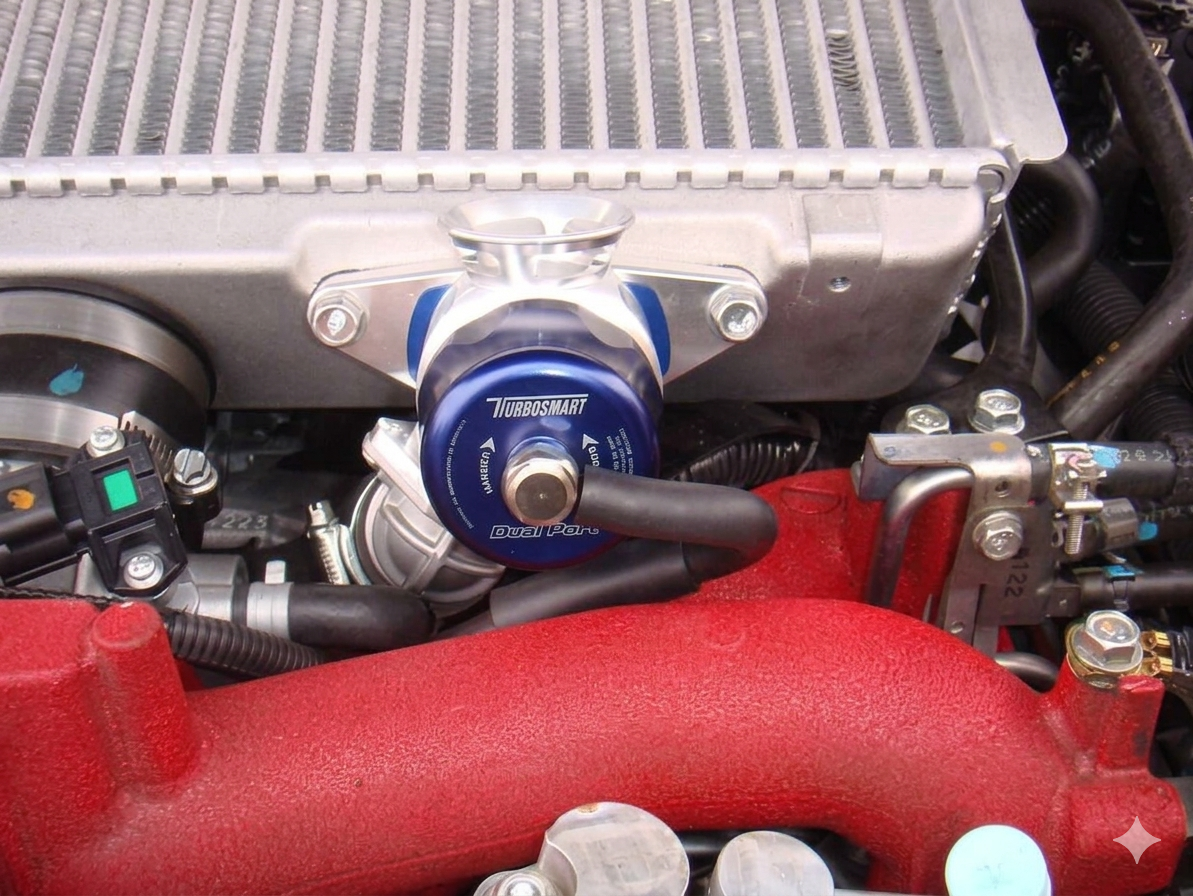
Start the car and check for leaks.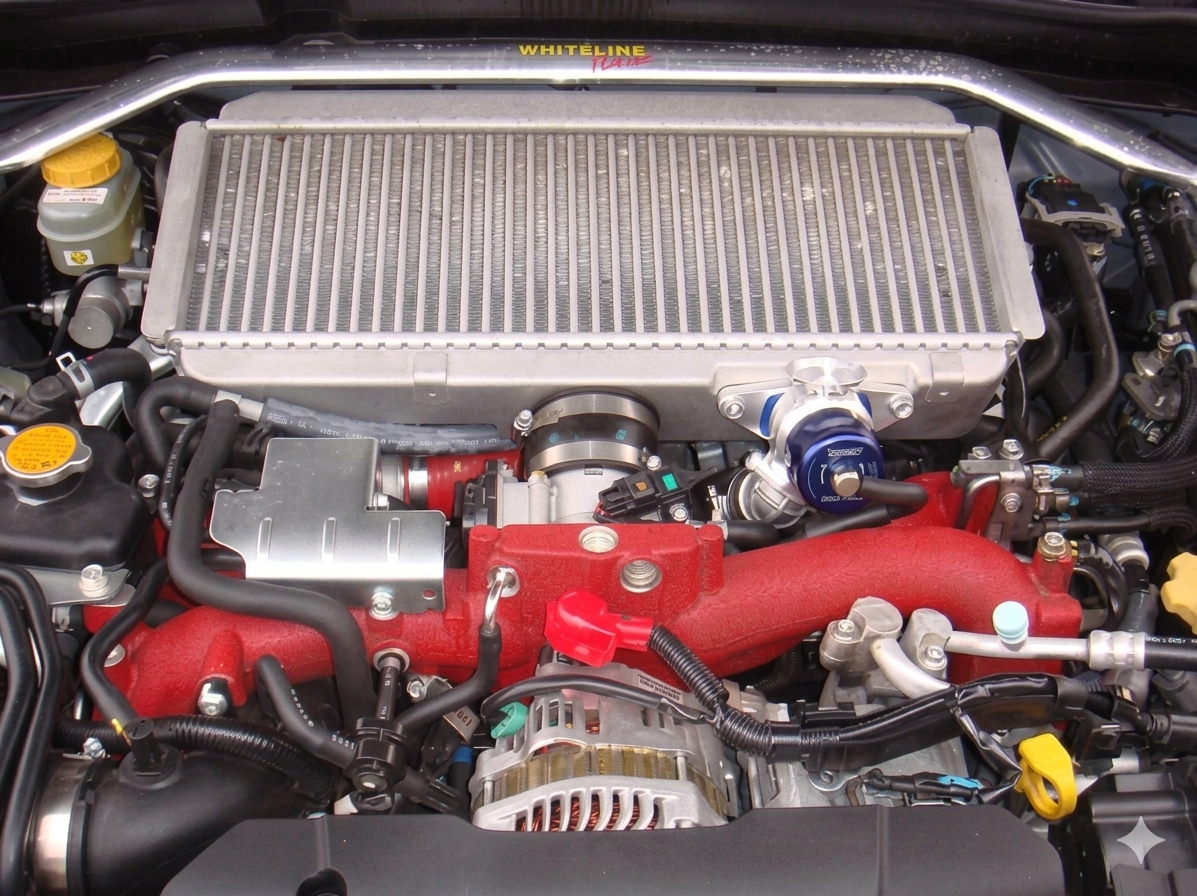
ADJUSTING YOUR BOV
Each BOV needs to be adjusted to suit the vehicle it is being mounted on. The aim of the adjustment on Vee Port’s, Supersonic’s and Dual ports is to make sure that the piston is hard closed at idle and that the piston closes fast enough to minimise backfiring and not stall the engine. Plumb back BOV’s are equipped with a spring which are designed to keep the piston open at engine idle and hence the cap can be left in the middle position.
Adjustment to the BOV is made by rotating the cap. To increase the spring force on the piston, rotate the cap clockwise in the direction of hard as marked on the top of the cap. To decrease the spring force on the piston, rotate the cap anticlockwise in the direction of soft as marked on the top of the cap - CAUTION- Do not rotate the cap beyond the first O-Ring indicator groove.
- Start with the BOV cap at the maximum soft position (The indicator O-Ring should be completely covered by the edge of the cap)
- With the engine at idle the exhaust port should be closed off by the piston – the piston should be hard against the seat and not floating or moving
- Free rev the engine and back off quickly, the engine should return to normal idle speed – if the engine drops below idle or stalls increase the spring tension by one turn
- Repeat this process until the engine free revs and returns to normal idle speed
- Test drive the car and ensure that when decelerating or changing gears that the engine has minimal backfiring and no stalling. If backfiring is excessive or stalling is noticed then check all connections made during the installation, otherwise increase the spring tension
MAINTENANCE
Turbosmart recommends that the following maintenance procedure is carried out at six monthly intervals or at higher intervals if the environment is very dusty or wet. Regular maintenance will ensure that your BOV is operating at its peak performance and will extend the working life of the product.
- Remove the cap of the BOV by rotating in an anti-clockwise direction – CAUTION, the cap is under spring force, remove with care!
- Carefully remove the piston and thoroughly clean the piston and the bore of the BOV
- Inspect the surface of the piston and the bore of the BOV for scoring or excessive wear, silver coloured marks on the bore are an indication of excessive wear
- Check the Base O-ring and the Cap O-ring for any damage – replace if necessary
- Lubricate the bore and the piston with Uni-Glide™, hydraulic oil or sewing machine oil – DO NOT use grease or viscous oils
- Re-assemble the BOV in the reverse order
TROUBLE SHOOTING
The following points should be checked if you find that your engine is dipping below normal idle, stalling or if the BOV is functioning poorly. Please note, the following checks will cure 99% of problems experienced with a BOV.
- Check the vacuum hose for splits, cracks, loose connection, kinking or any obstruction – old or fatigued hose may collapse under vacuum causing an obstruction.
- With the engine running remove the vacuum / boost hose from the nipple in the cap of the BOV, there should a loud hissing sound. The engine should idle poorly, double check by covering the end of the hose with your finger – otherwise the hose is blocked.
- Check to see if the BOV is blocked or contaminated with dirt or debris.
- Ensure that the vacuum / boost source is not shared and that the vacuum source is directly from the inlet manifold.
- Check the seal between the intercooler flange and the BOV. Make sure the supplied gasket is installed and the BOV Flange is secured on the intercooler flange with the two factory bolts.
- Ensure the spring clamps are secured on silicon hoses and fittings.
- Failing the above, submit a technical request to [email protected] with information of your engine configuration and photos of installation and one our expert technicians will respond as soon as possible.
RELATED VIDEO