TS-0223-1087 & TS-0223-1287 EM SERIES DIVERTER VALVE VR7Updated 3 months ago
| Product Name: | EM SERIES DIVERTER VALVE VR7 |
| Product Description: | EM SERIES DIVERTER VALVE VR7 (ZB Commodore) |
| Product Number: | TS-0223-1087 & TS-0223-1287 |
IMPORTANT NOTES ON YOUR NEW EM SERIES DIVERTER VALVE F150
- Turbosmart accepts no responsibility whatsoever for incorrect installation of this product which is potentially hazardous and can cause serious engine damage or personal injury
- The EM series BOV is designed for use as a factory replacement for a turbocharged vehicle that utilises an electronic diverter valve, this valve can be used on other applications so long as there is a control signal to actuate the BOV.
- Ensure the engine is cold prior to installation.
RECOMMENDATIONS
- Turbosmart recommends that your Blow Off Valve (BOV) is fitted and adjusted by an appropriately qualified technician.
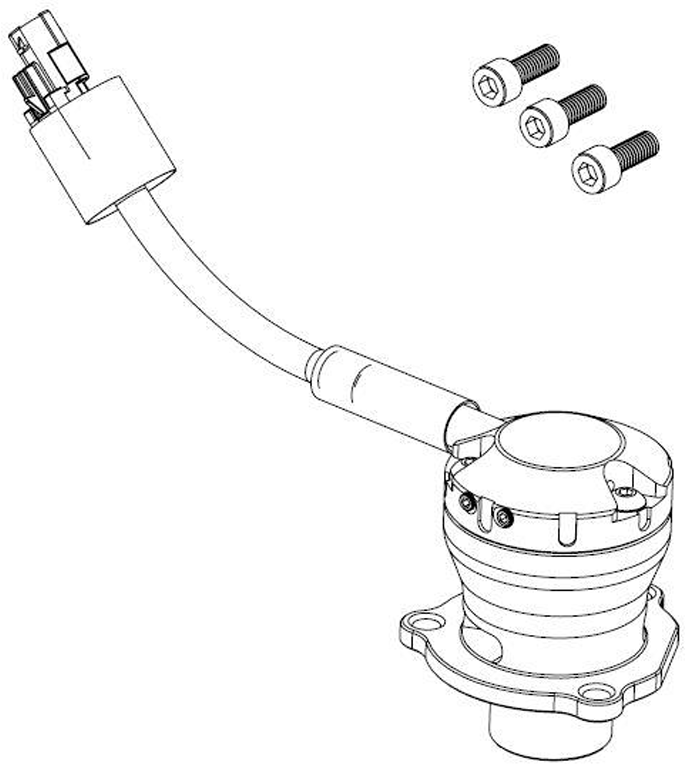
KIT CONTENTS
| Part | Description | Use |
| 1 | Turbosmart EM Series diverter valve | Main Unit |
| 2 | 3x Allen Bolts | Allen Bolts for mounting Kompact to mount |
TOOLS REQUIRED
- Allen key set metric
- Basic socket set
- Torx bits
ABOUT YOUR EM SERIES DIVERTER VALVE
Turbosmart has developed a unique “plug and play” diverter valve (or bypass valve) upgrade for your vehicle that is currently equipped with an electronic diverter valve. While we have developed this unit to be as simple as possible for you to install, we have not compromised on performance. This unit will not leak under elevated boost pressures and will still provide you with rapid response ensuring that all the OEM calibration strategies are not interfered with, providing you with maximum boost performance while the advanced strategies of the OEM’s are retained.
The EM series BOV is available in two configurations, Dual Port and Plumb Back. The functionality of the BOV is still the same, there is no performance difference between the two units, it is a personal preference if the user wishes to utilise a classic vent to atmosphere sound or revert all bypass gasses back into the inlet tract of the turbocharger.
As the valve is completely controlled by the factory engine control unit, the factory diverter valve is almost silent, due to our construction, it is possible that your EM series will be much more audible. By being able to hear the unit actuate, occasionally the valve may be opening for a few seconds under the following events such as traction control, cruise control management, rapid gearchanges and varying throttle position changes, these are all coded as part of the torque management software in the OEM engine control unit, there is no adjustment available over these functions via our product. By hearing these events, it is not abnormal, it is completely normal for the EM series BOV to be considered “very active” as it is protecting your turbocharger from surge events or bypassing air for torque management purposes.
EM SERIES DIVERTER VALVE OVERVIEW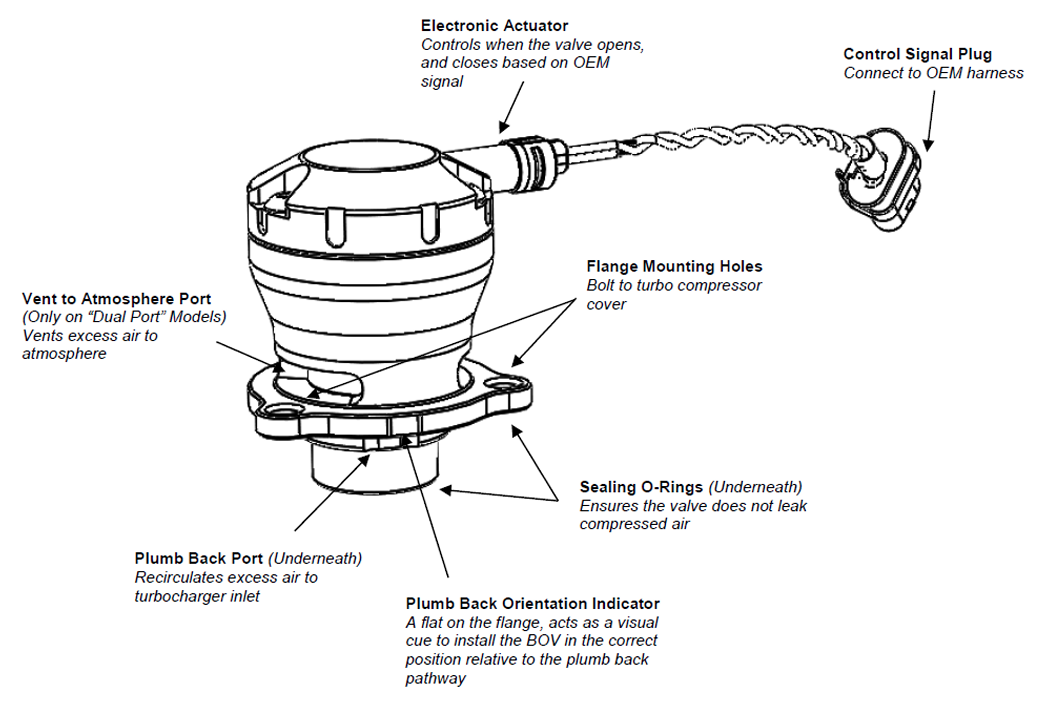
FITTING YOUR EM SERIES DIVERTER VALVE
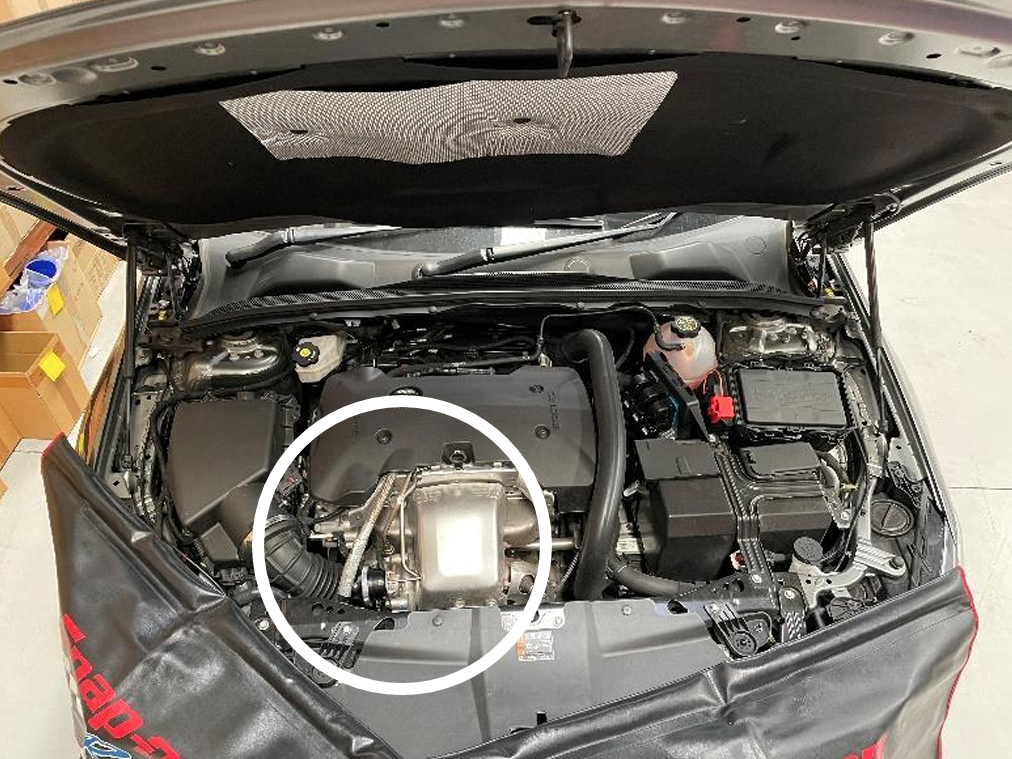
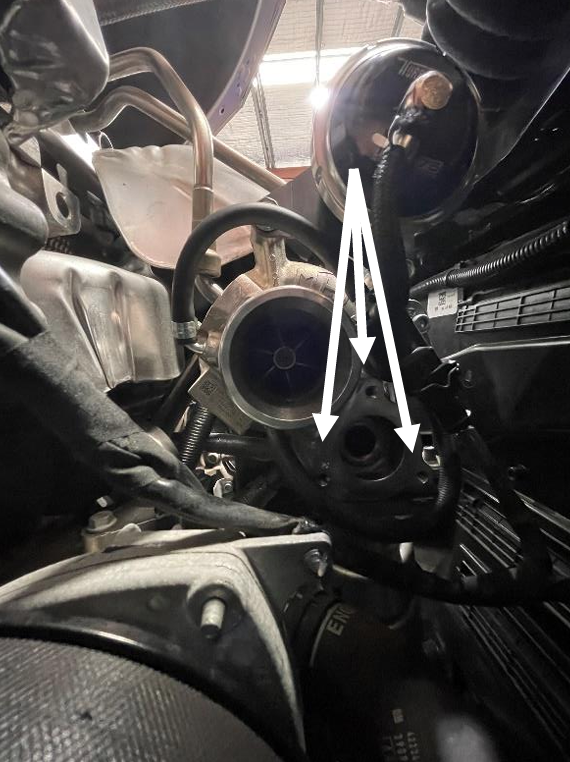
Identify diverter valve location

On the model designation (5th Generation) ZB Holden Commodore the Diverter valve is located on the compressor cover housing which is mounted on the front of the engine near the radiator. It has been located with a white circle.
NOTE!
- Allow for the engine to cool down
If the diverter valve cannot be located, seek assistance from your local specialist.
NOTE!
- It may be required to remove auxiliary components to access the diverter valve, ensure you consult your local specialist or a service manual for correct disassembly procedures.

Removing the OEM Turbo Intake
The OEM Turbo intake can now be removed from its current position. It has two hose clamps that will need to be removed. The braided hose connected to the intake will remain connected. There is enough flexibility to manoeuvre the pipe out of the way.
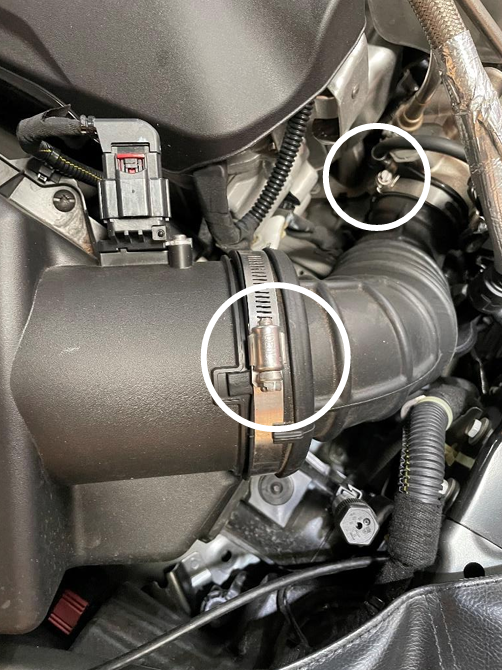
Shown below is the braded hose that will remain connected but will need to be removed out of the way.

Removing the OEM Diverter Valve
The Diverter valve is held in with three bolts, these will be replaced with 3 x Allen bolts. With the Intake pipe removed there is plenty of room to undo these bolts. Once removed unclip the electrical connector.
Mounting your EM series BOV
Install the Turbosmart Valve , remembering that the install is the opposite of the removal. Firstly, install the new valve in place. Making sure that both O rings are present and in place, making sure they remain in place tightening them up. The original bolts will be replaced by an Allen cap head bolt that uses a 5mm Allen key. Please consult your service manual for the correct torque specifications.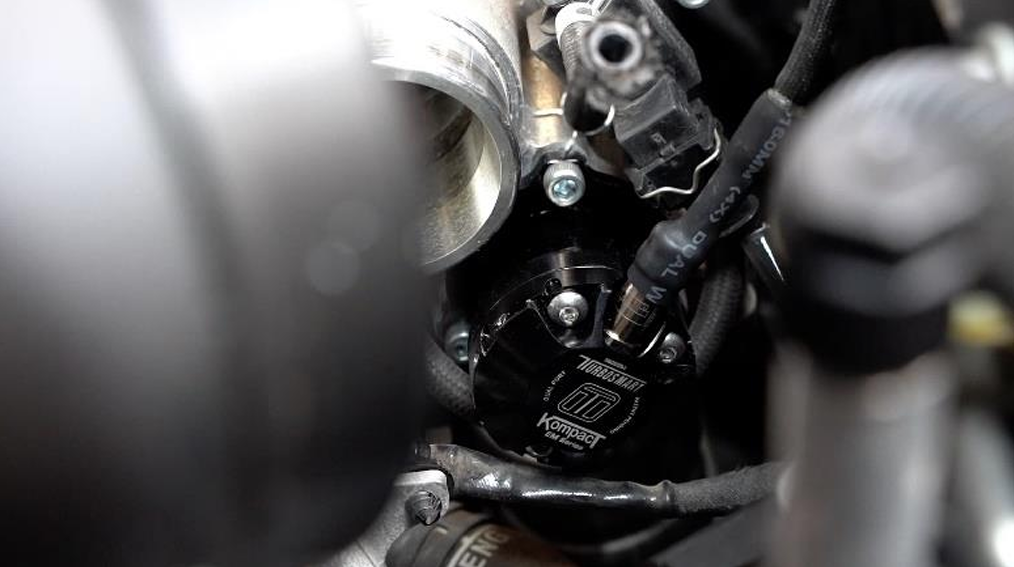
Connecting the Turbosmart Electrical connectors
Once the valve has been mounted, connect the electrical plug into the OEM factory plug and secure the wiring safely away from a heat source. Ensuring to hear a click of the connector locking together.
Connecting the OEM Charge Pipe
Place the OEM Turbo intake can now go back in, ensuring that the braided hose does not kink once seated. With the intake in place both hose clamps can be tightened. 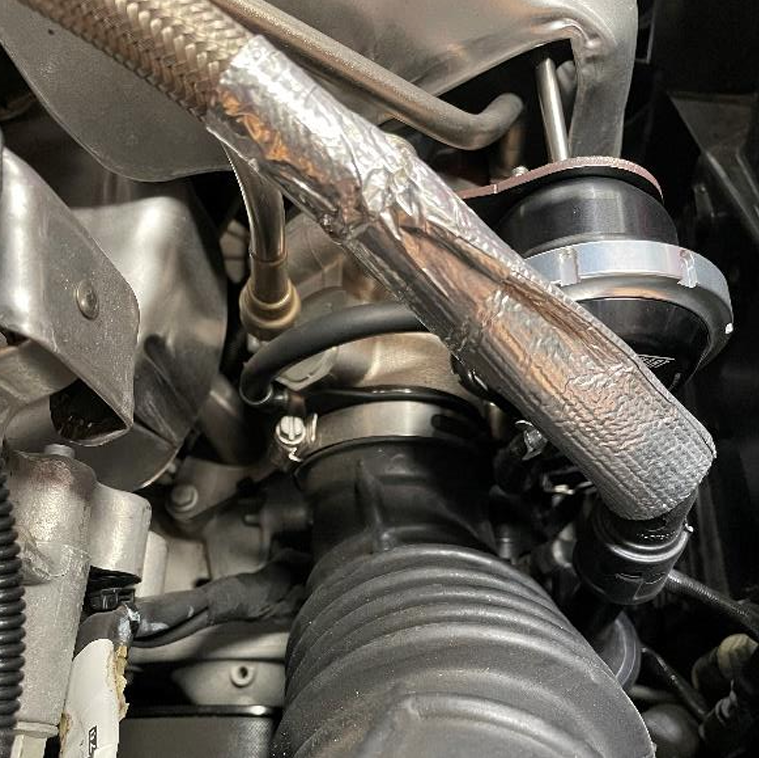
Testing your install
It is important to check for leaks and correct operation as well as listening for compressor surge. This noise is the sound of the boost pressure air running back into the turbo causing cavitation.
Now the car can be taken for a test drive in a safe environment and listen for the correct operation and that no turbo charger surge occurs.
CHANGING THE ELECTRONIC ACTUATOR
Remove Your EM series BOV
Remove the electronic plug from the EM series BOV and loosen the hose clamps on the inlet and recirculation hoses. Remove the BOV from the vehicles.
NOTE!
- Cosmetic engine covers may be required to be removed prior to the assembly being visible.
CAUTION!
- The turbocharger assembly may require the vehicle to be raised on a hoist or jacked up and secured using vehicle jack stands, ensure your safety is not compromised.
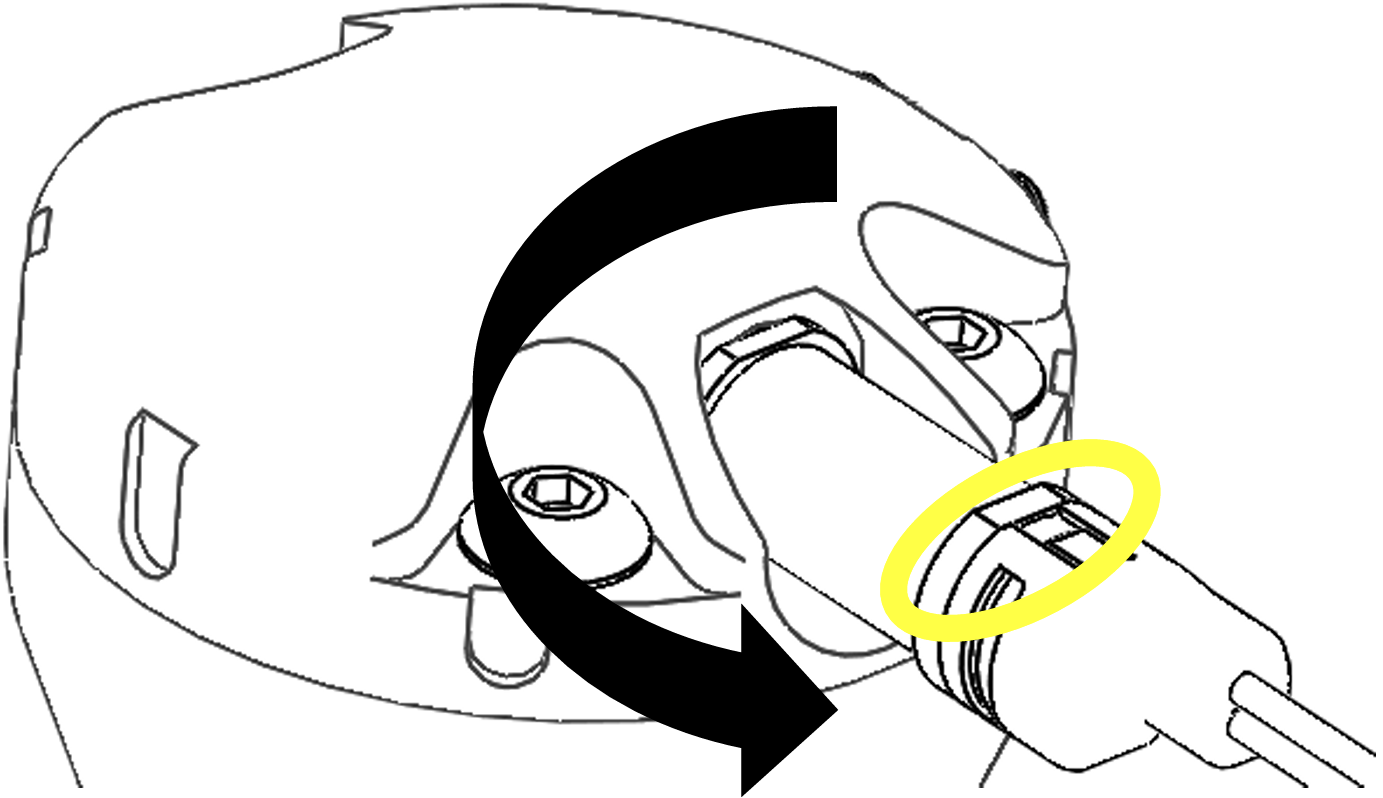
Remove Electronic Actuator from your EM series BOV
Using a 11mm open end wrench in the flat sides of the solenoid, undo the actuator in an anti-clockwise direction when viewed from the end. Ensure the wrench is placed on the metallic portion of the flats and not on the plastic cover.
Ensure the cavity is free from debris using avoiding shifting dirt into the passages.
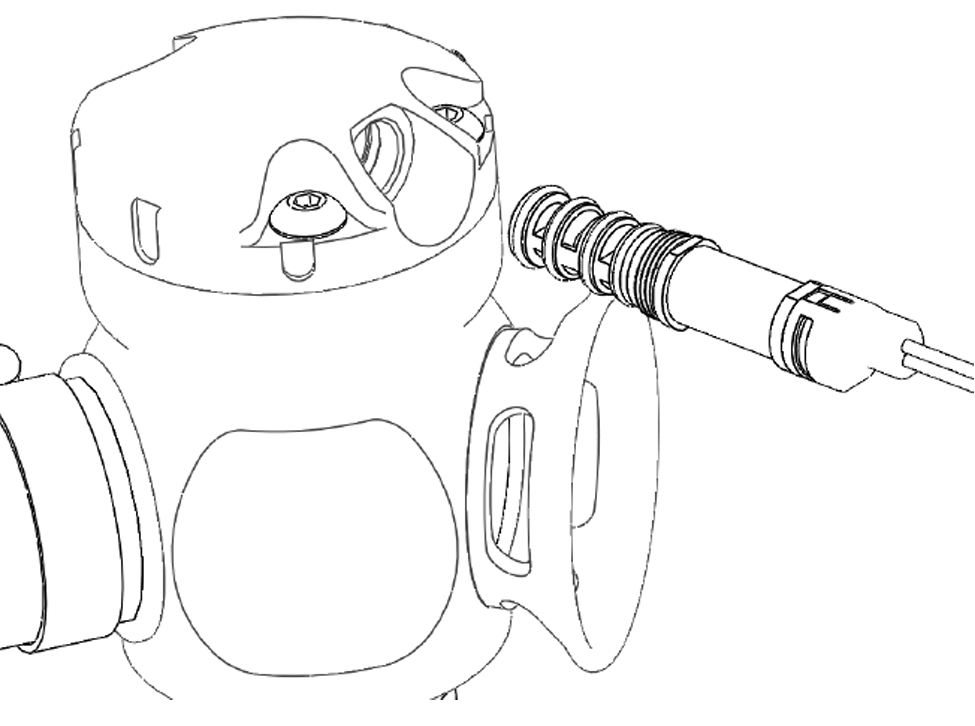
Install New Electronic Actuator into your EM series BOV
Ensure the O-rings on your new actuator are correctly seated in the grooves before installation.
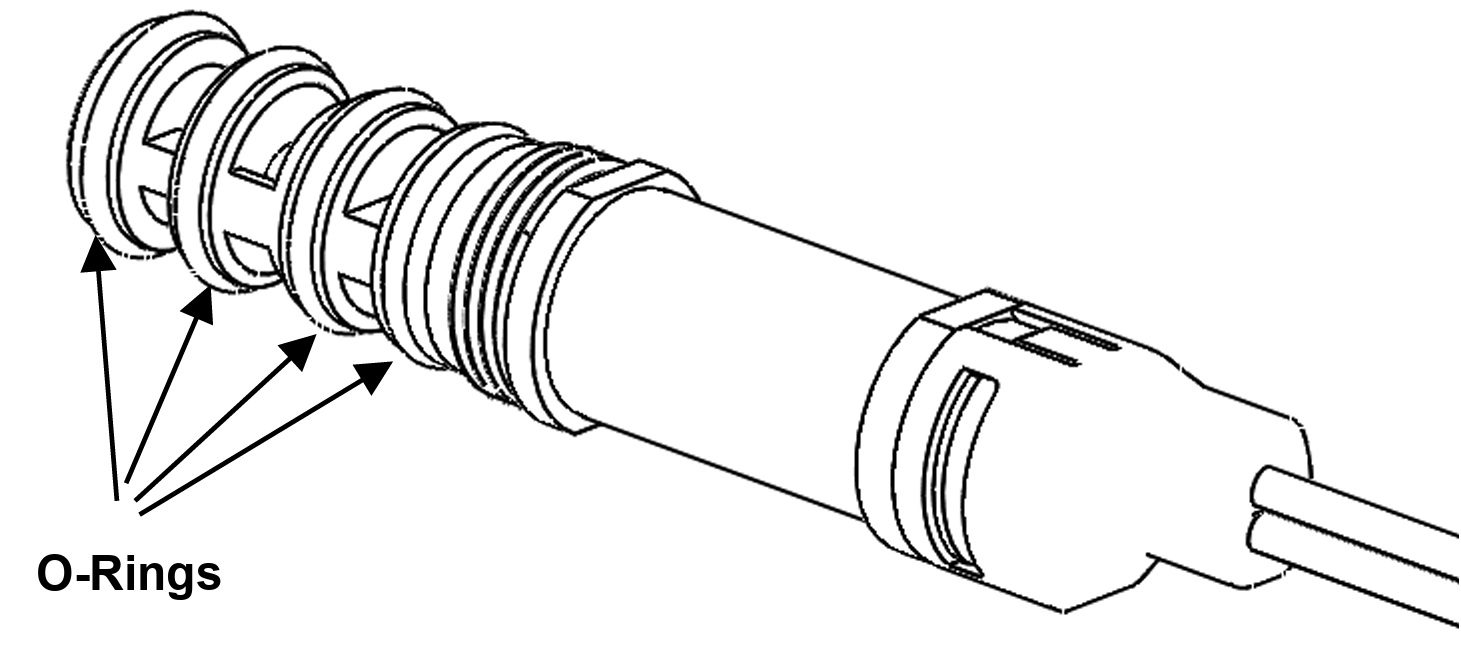
CAUTION!
- Failure to ensure O-rings are seated correctly may lead to cutting of an O-Ring and unexpected results from the EM series BOV.
Tighten the new solenoid into the EM series BOV ensuring the wrench is on the metallic portion of the solenoid.
NOTE!
- Tightening the solenoid on the plastic cover may result in unrepairable damage to the solenoid.
TROUBLESHOOTING
- Diverter valve not actuating - Confirm electrical signal plug is connected appropriately, as the plugs are new, some force may be required to click the plug into place.
- Valve is staying open - Confirm the valve has O-rings as they may have been dropped or lost during installation.
- Boost Pressure loss or lower than before - Confirm the valve has O-Rings as they may have been dropped or lost during installation.
- Failing the above, submit a technical request to [email protected] with information of your engine configuration and photos of installation.
- As the factory engine control unit controls the valve, the diverter valve is almost silent.
NOTES ON EM SERIES DIVERTER VALVE OPERATION
- Due to its construction, your EM series may be much more audible than the OEM valve
- During normal operation you may now be able to hear the valve open for a few seconds under the following events: traction control, cruise control management, rapid gear changes and varying throttle position changes. This is standard operation of your diverter valve and is coded as part of the torque management software in the OEM engine control unit; there is no adjustment available over these functions on the Turbosmart EM valve directly. It is normal for a diverter valve to be “very active” as it protects your turbocharger from surge events as well as bypassing air for torque management purposes.
RELATED VIDEO